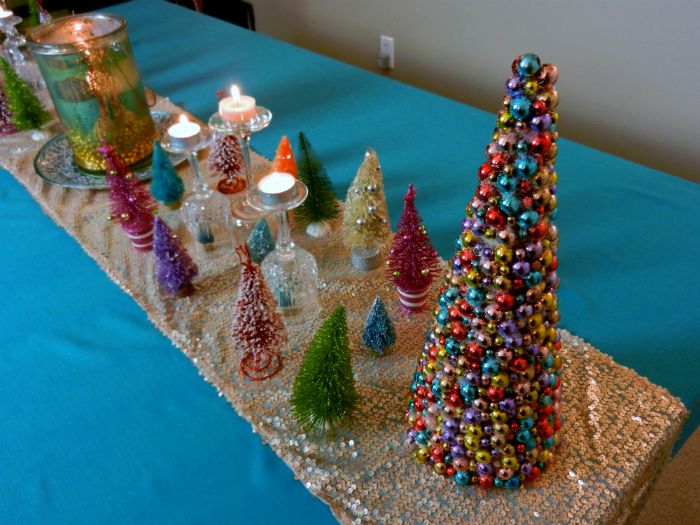
As promised, today we are talking about a cute and easy Christmas craft you can do, even if you don't consider yourself super crafty. These beaded trees make really pretty decorations and awesome gifts as well!
I finally made these trees after seeing some similar ones at Target last year for way more money than I was willing to pay. After Christmas last year, I found some beaded garlands on clearance at Target (in colors that I really liked) and snatched them up. I had this particular craft in mind, so I'm happy I finally had time to make it a reality!
What You Will Need:
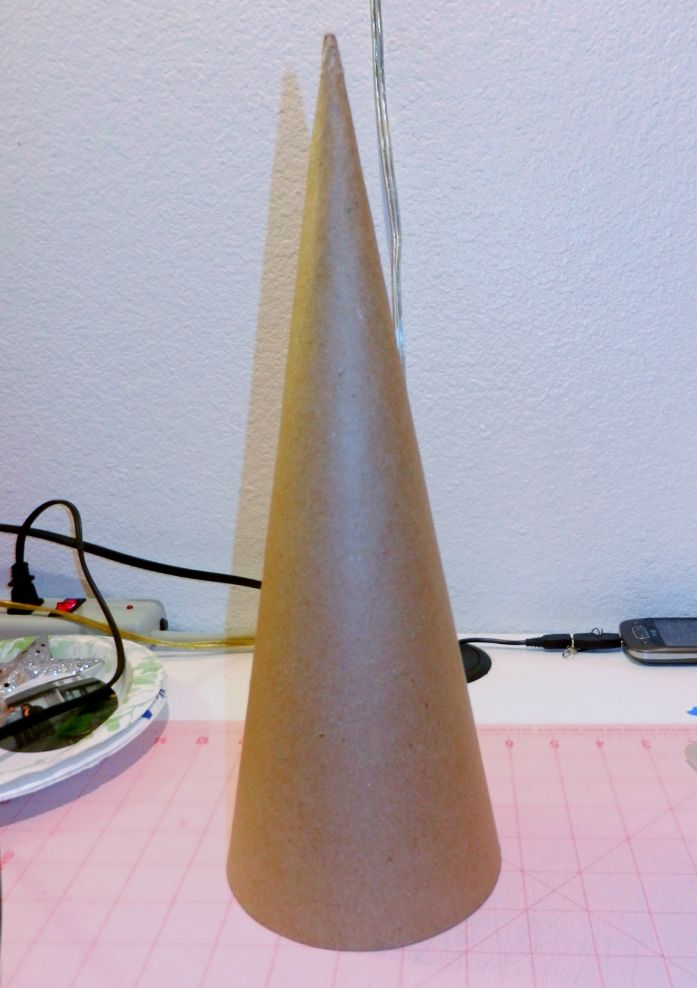
- Paper Mache/Cardboard cones (You can do one size or multiple sizes. This is up to you and your decorating needs. They can typically be found at your local craft store or online. The ones I'm using are 14 inches high. You can find some for inexpensive here. I bought items from this site when I was making wedding decor.)
- Beaded garlands. (If you can wait to display these until next year, snatch up clearanced decor after Christmas. It helps if the beads are similar in size and close together. I used 1 and a half 9-foot garlands per 14 inch tree.)
- Hot glue gun and lots of extra glue sticks.
- Scissors
- Modge Podge
- Glitter. I used a white glitter to give an icy effect, but you can use whatever color you like best.
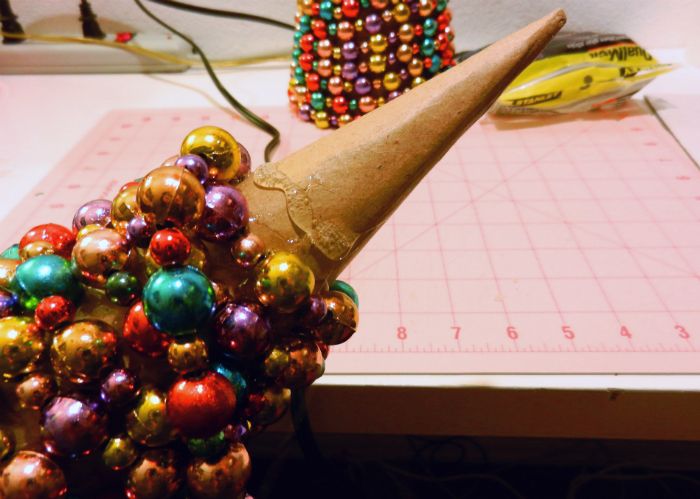
I always start my cones at the bottom and work my way to the top. The first row will definitely need some extra time to dry before you continue working on the project. Depending on how small or big your beads are, determine how close to the bottom your beads can be without disrupting the sturdiness of the cone. Start your first row by putting hot glue on the cone and pressing the end of your garland into the hot glue. I do about three inches at a time. Hold the beads in place until the glue is pretty much dry. This ensures a good adhesion. Once you start working your way up the cone, you won't need to take as much time securing everything. Also, remember that they call it HOT glue for a reason. Be careful not to seriously injure yourself. Although, I burn my fingertips and have glue sticking to them every time. lol
Continue up the cone with the hot glue and beads. Finishing the top can be a little tricky. Before you reach the tippy top of the cone, roughly map out the way the beads will end and where. I like to make sure I place them in such a way that there is still a bead at the tip. Generally, they lay in a way that makes them slightly taller than the cone, which is fine. You just want to make sure you glue them all securely. Once they are glued to the top, I snip the cord of the garland. Be careful when you cut the cord so that you don't lose the beads that are still strung up on the garland. Snipping the cord may also cause the beads at the top of your tree to fall if they aren't all glued down. If they do fall, gluing them back to the top is easy and does not mess up your tree.
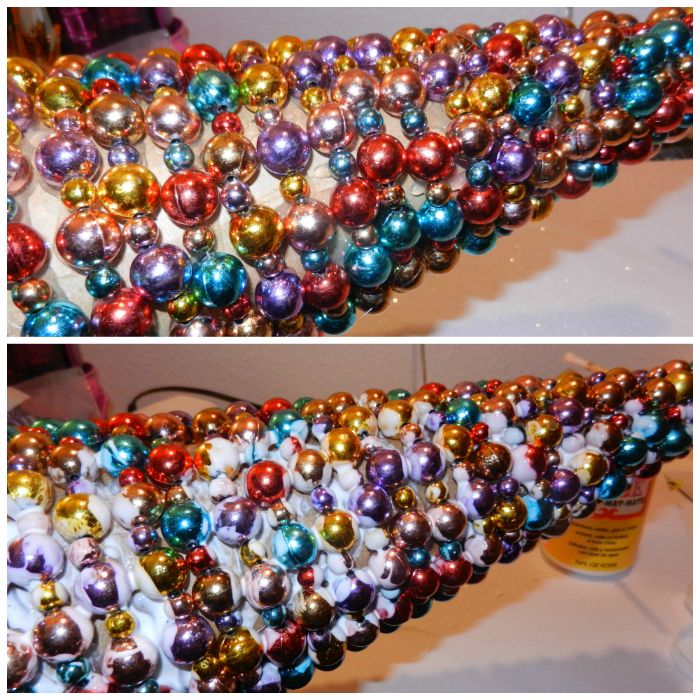
Once you are done with adhering the beads, it is time to decorate with glitter. I wanted to cover the holes in between the beads a bit. You could also paint the cone or cover it in fabric prior to putting on your beads. I used Modge Podge and a small sponge brush to dab glue into all the crevices and then sprinkled a ton of white, crystal-like glitter on top to resemble snow. This glue dries clear, so remember that things won't be this bright white.
I left the trees for a couple days to dry. Once they are dry, shake off the excess glitter. I also use a big, fluffy, stiff-bristled brush to brush off the excess.
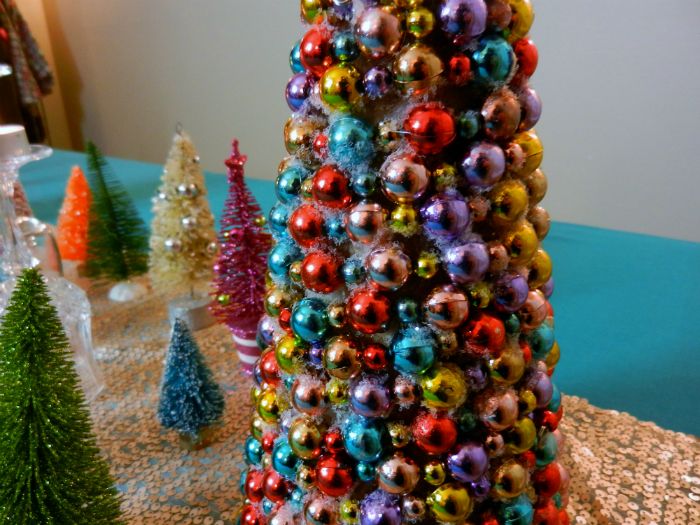
And TA-DA! Your tree is ready to decorate your home. As you can see, the glue dried clear and the glitter does give an icy effect, although not the full on snowy vibe I initially hoped for. Still they look great and I love the way they turned out!
Other ideas for decorating with cones (holiday or not): Cover them with fabric and embellishments like rhinestones, sequins, buttons, or fringe. Cover them in decorative moss and use a small planter to make them into topiaries. Paint them or use Modge Podge to adhere decorative paper to them. For a similar tree, you can snip off the top of the paper mache and insert a small star topper or even decorative picks as toppers. The possibilities are really endless!
For a Paper Tree tutorial using the same paper mache cones, check out this post!
Are you a crafter? Have you made similar trees or other Christmas decor this year?
Let me know in the comments!






I think I have established that I am the opposite of crafty. (Except for tie-dye, but that doesn't involve hot glue.) If I tried this, those beads would be stuck to everything EXCEPT the cone, and the cat would be sticking to the cone....
ReplyDeleteSo I'll just admire your pretty sparkly things. :)
hahaha Poor kitty cat is always up to no good. I did have an incident with cutting the string and beads going everywhere and I did have hot glue sticking to lots of my fingers, but I am used to that. lol
ReplyDeleteWhat a cool craft! I am not super crafty, but my mom is. What she considers simple, I often struggle with. She's one of those "Oh, you can make that" when we see things out shopping. No, Mom. YOU can make that. lol I certainly can't. But I do think I could make this!
ReplyDeleteYou make a good recommendation about scoring the garlands and materials after the Christmas holidays. That way they're at a steep discount. You just have to wait until next year to do them. I think that's helpful anyways. If I have them around all year, I'll keep thinking about them and remember to do them in advance. Whereas if I wait until the holidays to start on a craft, it'll creep up on me and I'll feel too rushed to make it happen.
Wise advice, Hailey! Such a whimsical piece! It would look at home with all of our retro decor, too!
<3 Liz
www.withwonderandwhimsy.com
Thank you! I think it would look great with your decor too. Plus, you can always be on the lookout for beaded garlands that go with your decorating colors. You could make them for any holiday really, or year round decor. I like that the possibilities are endless.
ReplyDeleteI usually am the person that says "I can make that!" when I am out shopping, especially if something is too expensive. But then I also have to think about collecting the parts and finding time to make it and all that. Like the ornament wreath you and your mom made. It is so cute! And I have been wanting to make one. Jo-Ann's craft store sells them for EIGHTY DOLLARS. Which is INSANE!
Let me know if you make some trees in the future times!