In today's post, I am once again teaming up with my blogger buddies Janeane, Liz, and Nina to bring you a holiday prep course with a vintage-inspired twist. We really love doing these fun collaborations together and hope you are finding some inspiration in each of them.
We are each taking on an element of holiday party planning - food, decor, clothing, and makeup/hair - to give you some tips and inspiration for preparing your own party or spectacular entrance. We've also decided to take on these tasks with a retro 50s-inspired theme! Janeane of Designing From My Closet is talking home decor. Liz of With Wonder and Whimsy is serving up a retro cocktail party, while Nina of Curvy Mod brings you vintage-inspired fashion. I'm taking on makeup and hair with a pictorial and walk-through, along with some helpful links to get you all done up!
(I decided to do this makeup tutorial with pictures instead of video. A while ago I did a blog survey where a majority of you said you hate watching videos. So we're gonna try this and see how you like it. I'd love to hear your updated thoughts in the comments.)
Vintage-inspired makeup is so classic and really timeless that it looks great on everyone. There is nothing old-fashioned about wearing a more vintage look today. It is still as beautiful and feature-enhancing today as it was so many years ago. Let's get started!
Makeup
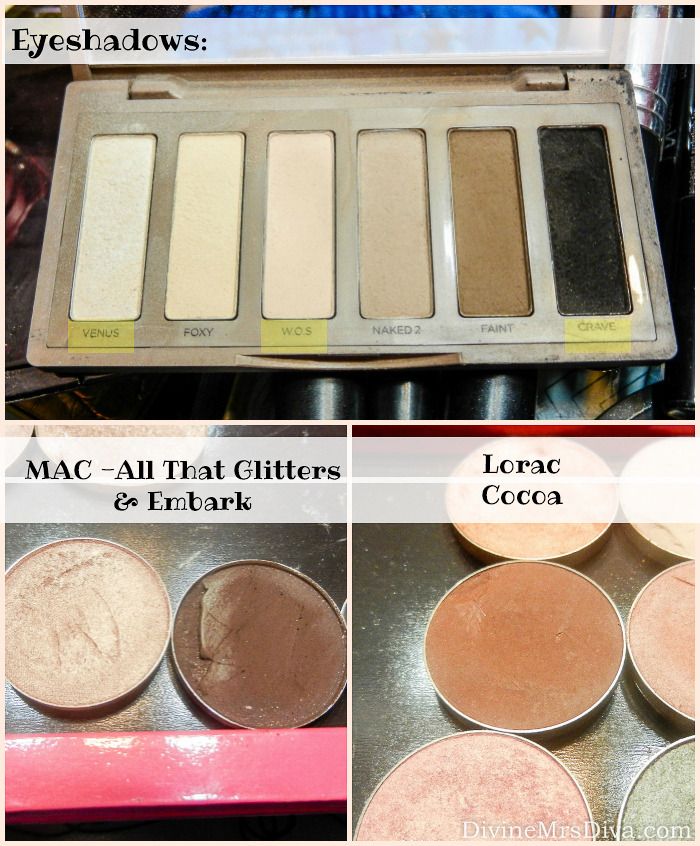
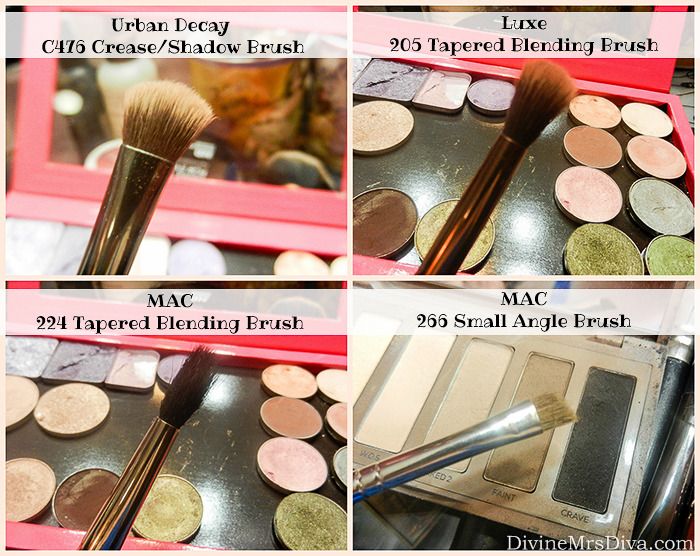
If you are new to makeup and don't know the names of the areas of the lid, this diagram is a good reference. I also want to touch on the eyeshadows and brushes I used to create this look. From the Naked Basics Palette, I used Venus, W.O.S, and Crave. I also used the colors All That Glitters and Embark from MAC and Lorac's Cocoa. For brushes, I used an Urban Decay shadow brush with a thick pointed crease brush on the other end, two tapered blending brushes with different shapes, and a small angle brush. I will talk a little bit about them in the tutorial.
Before I did my eyeshadow, I went ahead and applied my primer, concealer, foundation, powder, and eyebrows as usual. I primed my lids with Urban Decay's Eyeshadow Primer Potion in Sin (on the lids only). It is a champagne shimmery color to add some extra sparkle. From the crease to the brow bone, I applied the original formula Urban Decay Eyeshadow Primer Potion.
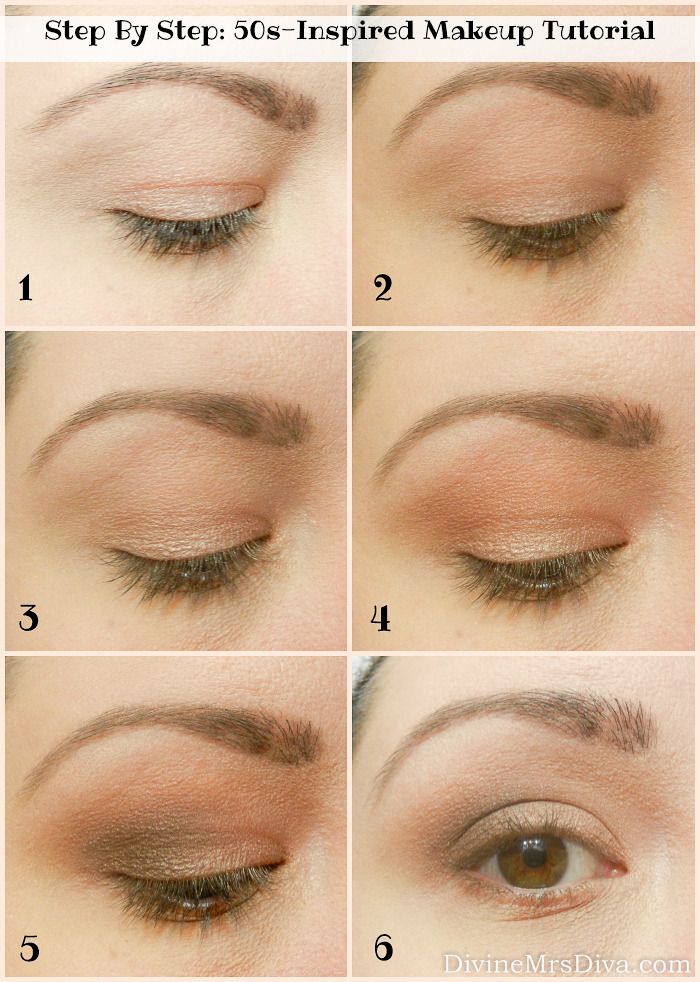
1 - Start with a primer base. I never skip primer because this really helps the shadow stay put, keeps it from creasing, and makes for better pigmentation. Whether you are using cheap eyeshadows or more expensive ones, never skimp on primer! My favorites are Urban Decay's Eyeshadow Primer Potion, Too Faced Shadow Insurance, Benefit Stay Don't Stray, and Nars Smudge Proof Eyeshadow Base.
2 - Because I am using all powder shadows, I like to start with a base of shadow close to my skin color to help me blend out and diffuse the edges of color I am going to add. For me the color closest to my skin tone (but just a little brighter) is W.O.S from the Urban Decay Naked Basics Palette. I sweep it over the entire lid and all the way up to my brow.
3 - Apply All That Glitters over the entire lid but not past the crease. Make sure the inner third of the eyelid is the most shimmery part.
4 - Take a wider tapered blending brush and apply a warm lighter brown (Lorac Cocoa) all along the crease. I typically take my crease color about halfway towards the inner corner. I also have more hooded lids, so I take the color up higher as well. I like to stop and look directly in the mirror to judge how far to take the color past the crease so it can be seen when my eyes are open. The back and forth "windshield wiper motion" is very helpful in blending the color out so it fades up nicely.
5 - Using the darker brown shade (MAC Embark) and the more pointed tapered blending brush, apply the darker shadow to the outer corner of your eye. I keep this to a V shape on the outer corner and blend, blend, blend. The more you blend, the softer the color looks. You can build it up if you need to or use your other tapered brush to add Cocoa back in to help blend. It is basically a bit of back and forth until the color and blend appeases you.
6 - Using the thicker pencil brush or pointed crease brush, apply Cocoa from the outer corner to inner corner along the lower lash line. If you need to even up your shadow shape or blend out the edges, use the first shadow brush and W.O.S to clean up the edges and blend them out. This can also be used to lighten up any areas you feel are too dark.
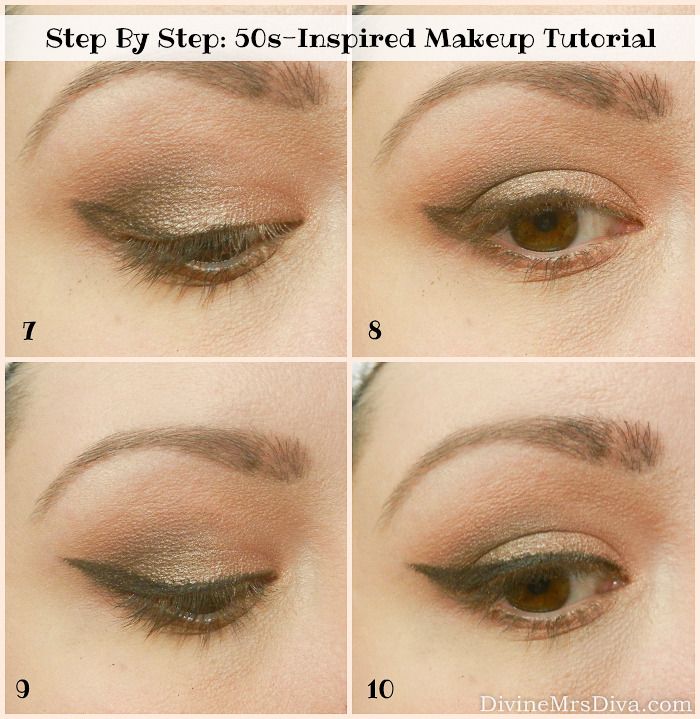
7 - Working on the winged liner can get tricky. I am not super experienced at it, but it is easier when you apply a few tricks. Using a small angle brush, go in with a black shadow (UD Crave) and draw in your first line from the corner of your eye up. Do both eyes at the same time to ensure the wings are even. A Q-tip is a handy tool to clean up the edges if need be. Once the initial lines are good, use the same powder shadow method to bring another line towards your lash line. You can also use this method to practice doing the entire wing without using the waterproof liner.
8 - Push some of the black shadow along your upper lash line to the inner corner of your eye.
9 - Now your ready for the big guns! Using a waterproof gel liner (I am using Smashbox Jet Set Waterproof Eye Liner. It doesn't budge!) and the small angle brush, go over your powder line with the gel liner, from the wing and all along the lash line. From here, you can start building up the line and smoothing it out. Mine doesn't look super crisp along the top (because my angle brush is dying) and I would like it to have been straight cross the top as well, but I honestly didn't notice that in person. I was happy with the way it looked until I saw these photos. SO, that just goes to show that it does not have to be perfect for it to look good. Just keep practicing. Cora from Vintage or Tacky has a video on doing winged liner, though she did a thicker line than I did.
10 - Make sure you step back and take a look in the mirror to see how it is looking. You may want to make it thicker, darken it, or even it out more.
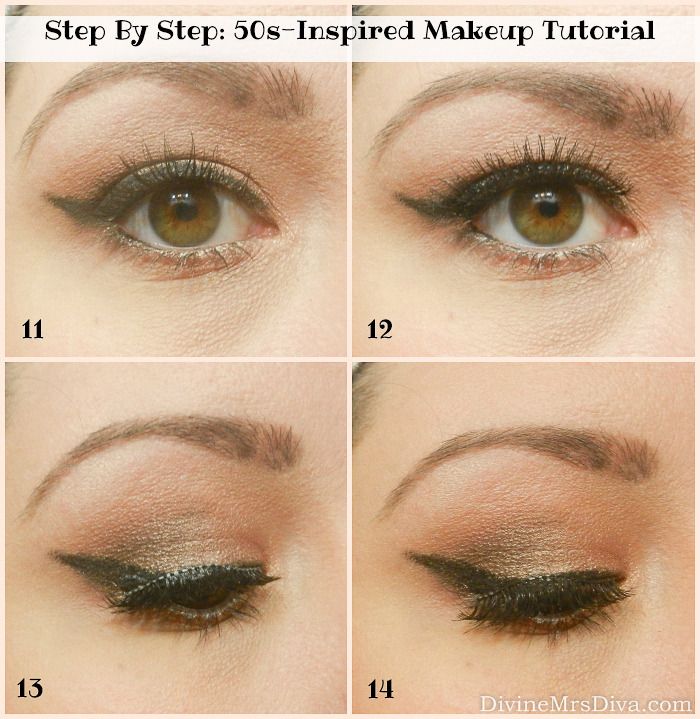
11 - Curl your lashes. Using a black eye liner (It Cosmetics No-Tug Waterproof Gel Eyeliner), add some color along the upper lash line. This is particularly needed if you have lighter eyelashes. This helps define your eye and will help things look seamless. Apply mascara as usual (Bobbi Brown Intensifying Long-Wear Mascara). Run a white or light-colored pencil along your waterline to brighten your eye. (It Cosmetics No-Tug Waterproof Gel Eyeliner in Highlight)
12 - Now, you certainly don't have to add false lashes, but they really amp up the look by adding that volume and length to make your eyes pop. Since we're talking about a holiday party look, I went for it. Applying false lashes is another tricky part that takes some practice. Cora also has a helpful tutorial on this subject. I used some cheap false lashes from Sephora and Duo Lash Glue.
13 - As you can see, I did a crappy job on mine. I don't wear falsies much and I haven't practiced, obviously. You want the band closer to your lash line than my attempt. Also, cheaper lashes seem to have the white band. But look, if you mess up like I did, don't panic.
14 - Take your small angle brush and the gel liner you used for the wing, applying the liner over the white parts of the band and thickening your line if necessary to hide the false lash band. No worries. I also finished the eye off by taking the darker brown outer V shade and smudged it along the lower lash line.
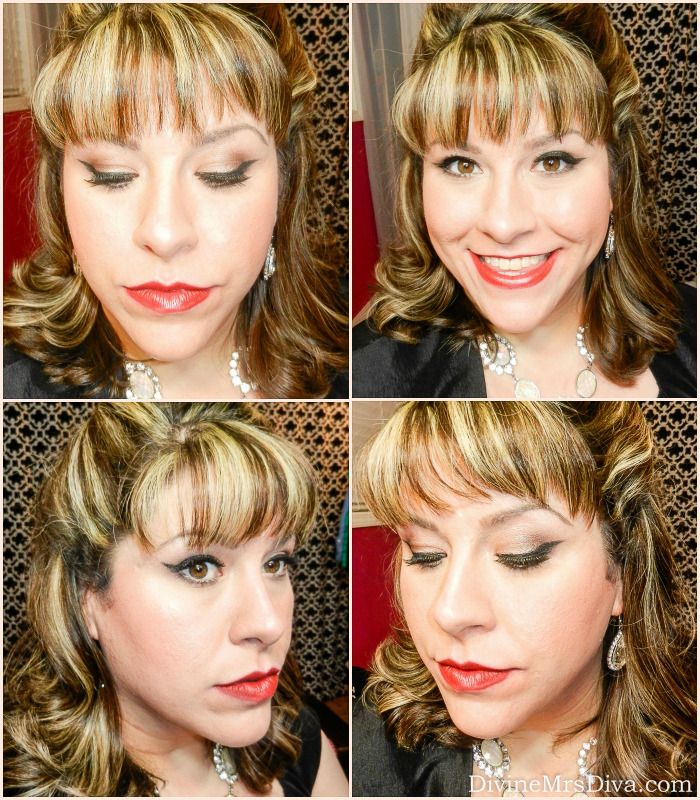
Once you are done with your eyes, clean up any fall out and finish your face. I always contour (theBalm Bahama Mama and Balm Desert), add blush (I used a warmer peachy pink color for this look in Quarters by Colourpop), and highlight (Becca Shimmering Skin Perfector Pressed in Opal). I also never leave home without using my Hourglass Ambient Lighting Powders. My favorite is Luminous Light, but I used Dim Light for this tutorial.
For lips, I lined my lips and filled them in mostly with Nars Velvet Matte Lip Pencil in Cruella and patted theBalm Mia Moore in the center. I also added a little bit of my highlighter and a glittery gloss to the center of the lips to help them appear more full. For more pointers on the perfect red lips, check out another one of Cora's videos. Seriously, I love her!
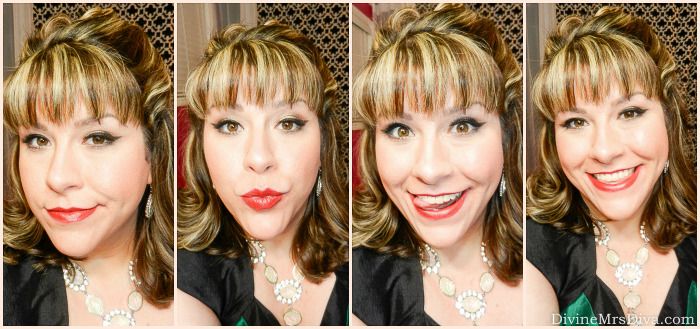
Congratulations!! You are done with your makeup! Of course, since you put so much work into it, take a million selfies!
To create a softer look, use brown eyeliners. To modernize it a bit, try using a colored liner for the wing or along the lower lash line.
Hair
In researching hair and makeup looks for this post, I found so many pretty styles. Victory rolls were a common feature, so I thought I would attempt them. They are very simple to do, but just take a little practice in rolling and pinning. There are also lots of ways to wear victory rolls, so don't be afraid to play with it and make it your own. There will be a link to more hair inspiration at the bottom of this post.I found this video to be extremely helpful in watching the process before I attempted it. I am basically going straight from this video tutorial, so check in with it if you need any clarification (or you can leave a comment for me if you have any questions). I will add, this is my first time doing victory rolls, so I can assure you that YOU can do it too! It was very simple, but forming the hair into a roll and securing it was the hardest part.
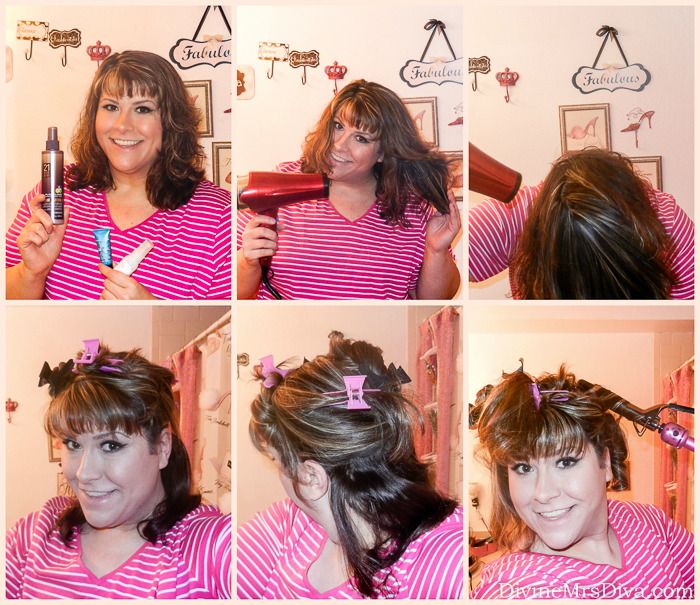
- Before I got started, I spritzed my usual leave-in conditioner in my hair and put a couple of serums in to ensure a smooth blow-out, heat protection, and shiny locks. (Pureology Colour Fanatic Multi-Tasking Hair Beautifier, Bumble and Bumble All-Style Blow Dry, Bumble and Bumble Hairdresser's Invisible Oil Primer)
- Blow dry as usual, remembering to dry your hair upside down for more volume! I have really thick, mildly coarse hair so it takes a while to get it all dry. And I love volume!
- Next, part your hair in your usual way if you so desire. Then section the hair on the front of your head and secure the sections with clips. I decided to start this main section for the victory rolls from the front edge of my ears forward. Part your hair with a comb for a straight line.
- Now take sections of the back hair and curl them with a curling iron, working your way up. I started about two inches up from the bottom, dividing that section into four equal parts. In curling your hair, you want all the sections to be roughly the same size. Make sure to curl the hair in the same way/same direction as well for a uniform look. As you finish each larger section, roll the curls up and pin them with bobby pins against your head.
- The best way to pin the curls is to cup the curls in your palm and move your hand closer to your head, shaping and rolling the curl and pinning it into place. Don't wait too long to pin it because you want it to cool while it is pinned up. You don't have to be too precious about this process. I was a little messy with it, but everything still turned out fine.
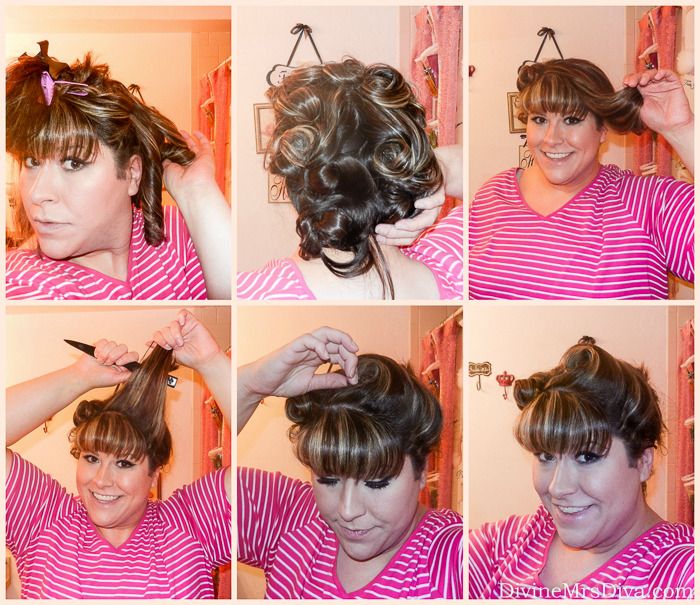
- Once all your hair is curled and pinned, go get a festive holiday drink and sip on it while your hair cools. Once your curls are cooled down, unpin them. Make sure you keep the front sections separate. We are gonna work with those first.
- Take one side of your front section and comb it out together. I started with the larger section of hair. Pull it up and tease the back of the section like crazy. This helps with lift and stability for it to hold. I had to tease and smooth a few times to get it how I wanted. Continue this process to your liking. Smooth the front of the hair with the brush or comb (I used a teasing brush.) and start pulling the section towards the center of your head. Making sure the sides are as tight as you want them, begin to roll the ends of your hair towards your scalp into a loop of hair. This is similar to what you did to pin your curls in the first place. This may take some time and patience in perfecting the smoothness of hair and placing the curl exactly where you want it. I placed mine slightly off center, but you can even put them farther to the side. This will also be dependent on how long your hair is as well.
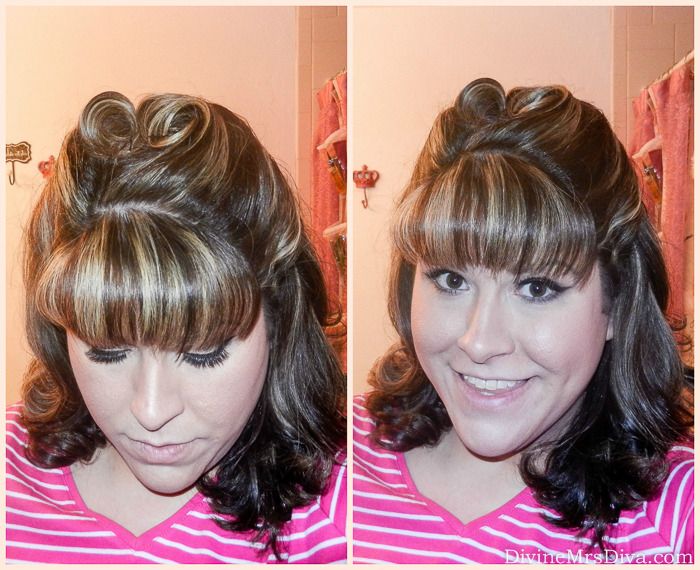
- When your curl is exactly where you want it, hold it against your head and pin it with bobby pins. I used two per curl to keep them secure. The amount they stick up is completely up to you and your hair. The more you tease it, the more sturdy it will be to hold in place. Repeat this process on the other section.
- Next, use a brush and gently brush out your curls. This may cause a bit of frizz, so you can smooth a bit of hair oil over the rest of the hair to keep the frizz at bay and add some shine. (I used Macadamia Healing Oil.) Once all the hairs were in place, I spritzed a light layer of hairspray on top for hold.
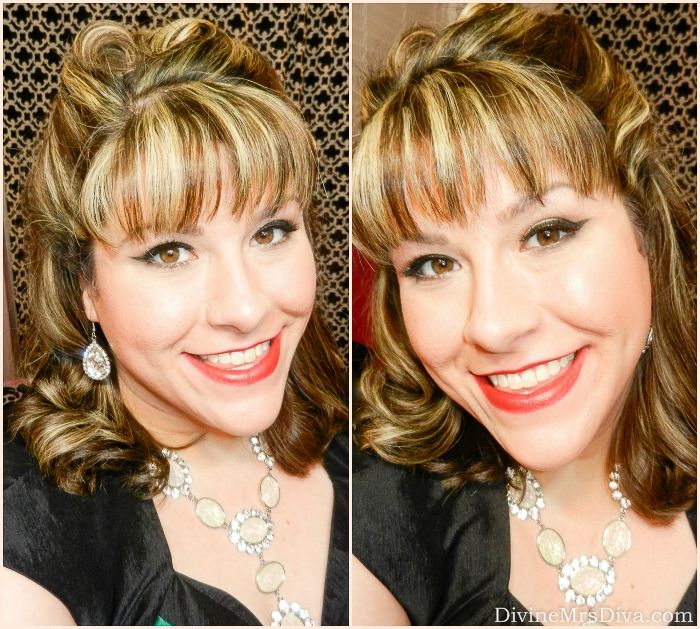
- TA DA! You're done! For more vintage-inspired hair and makeup, check out Pinterest.
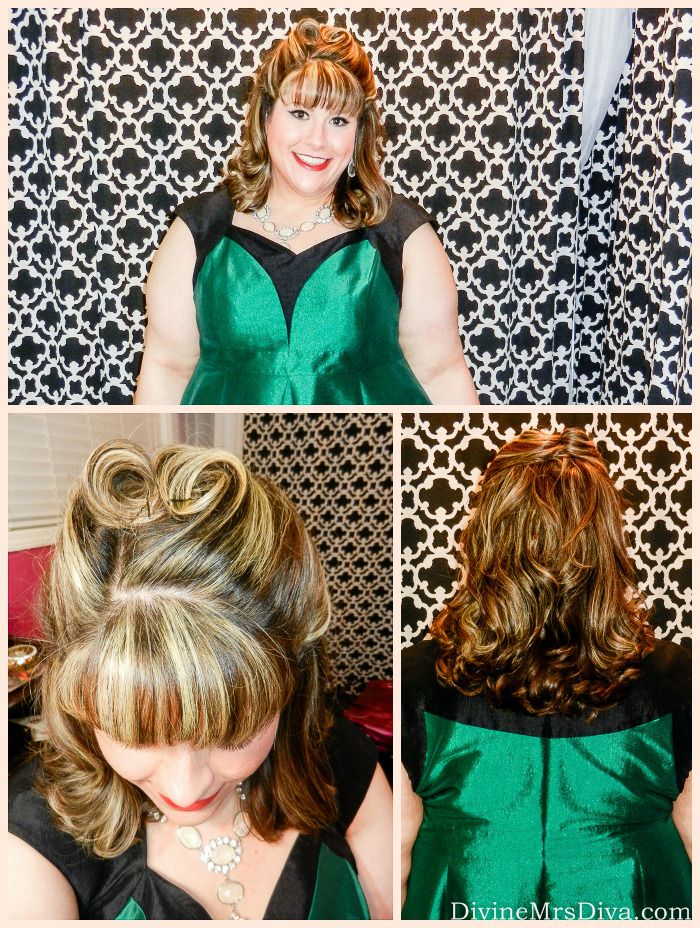
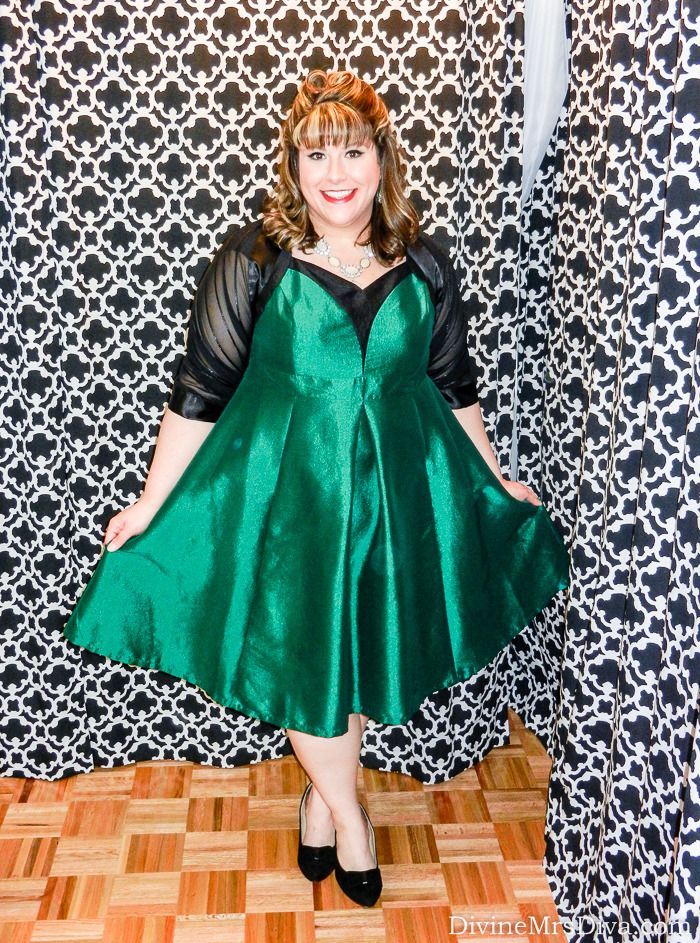
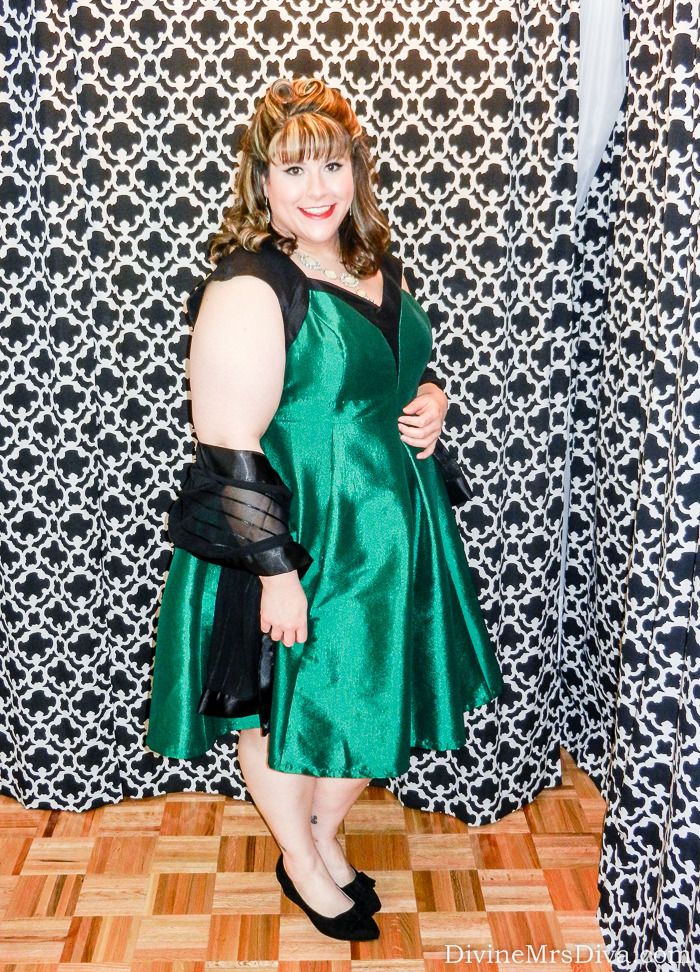
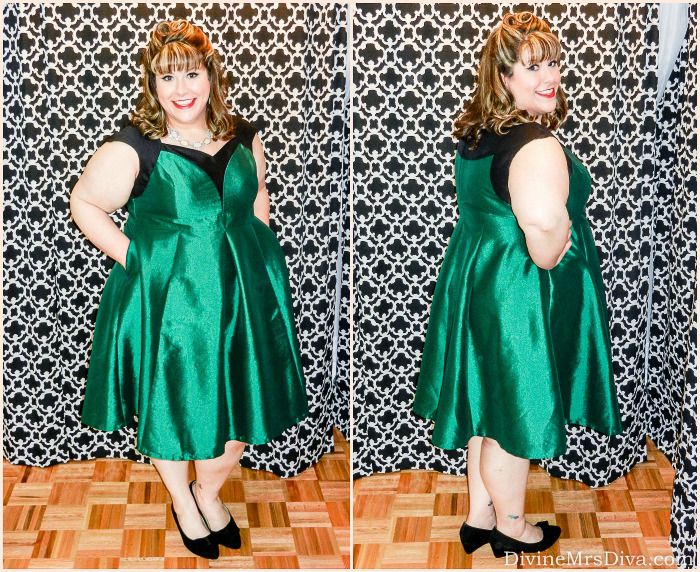
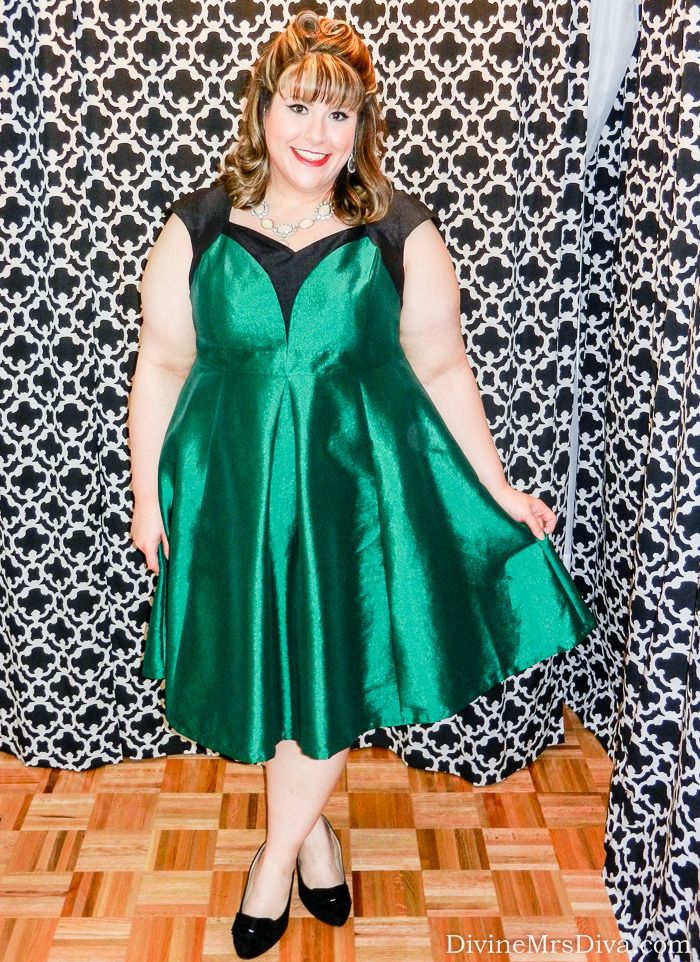
As it all comes together, you will be super glamorous! I happened to have this Cherry Velvet dress on loan via Gwynnie Bee, so I donned it for photos. I am wearing the Dita Holiday Dress in a 3X and it fits really well. The material makes it stick out a little bit more, but I love the fit-and-flare silhouette. It was the perfect dress to complete my vintage look!
Cherry Velvet Dita Holiday Dress - via Gwynnie Bee
Velvet Bow Wedges - Avenue
Rhinestone Necklace - Charming Charlie
Make sure to check out the other ladies' posts:
- Retro 50s Cocktail Party with Liz of With Wonder and Whimsy
- Vintage Holiday Home Decor with Janeane of Designing From My Closet
- Vintage Inspired Holiday Fashion with Nina of Curvy Mod
Are you a pro at winged liner and false lashes? Do you have a favorite beauty tip you'd love to share? What are some of your favorite ideas covered in our "Getting Ready For The Holidays" collaboration?




I have already read this post three times and saved it to my saved posts in Bloglovin! I have always wanted to try a winged eye and the way you have explained it makes me feel like I can do it. And showing all the brushes really helps too. The hair is so amazing too. You have a similar length as me without bangs and I think this is so retro yet can look so good in a modern setting. I cannot express how great this entire post is Hailey!
ReplyDeleteJaneane
Designing From My Closet
Thank you, Janeane! I'm so glad you found it helpful and inspiring. I was hoping the way I explained everything was clear enough. Sometimes it is so much easier to just show in a video, so this was a bit of a challenge for me. I loved it though! Have you tried any of the hair or makeup bits yet? I'd love to know how they turn out!!
ReplyDelete