I've spent my whole makeup-wearing life standing in front of the mirror in the bathroom to apply my makeup. Seeing the pretty vanity tables in movies and television shows always made me jealous. I longed to sit at a convenient table and enjoy the time it takes to paint my face. It just always seemed like a luxury I couldn't afford or something just out of reach.
Enter this post by MsTapioca that I spied via a friend's posting of it on Facebook. Using simple pieces from Ikea, she put together a small but convenient vanity table. This I could do. This was attainable. We have an Ikea just across the river; and while I wouldn't know where to start construction-wise on it, my husband did.
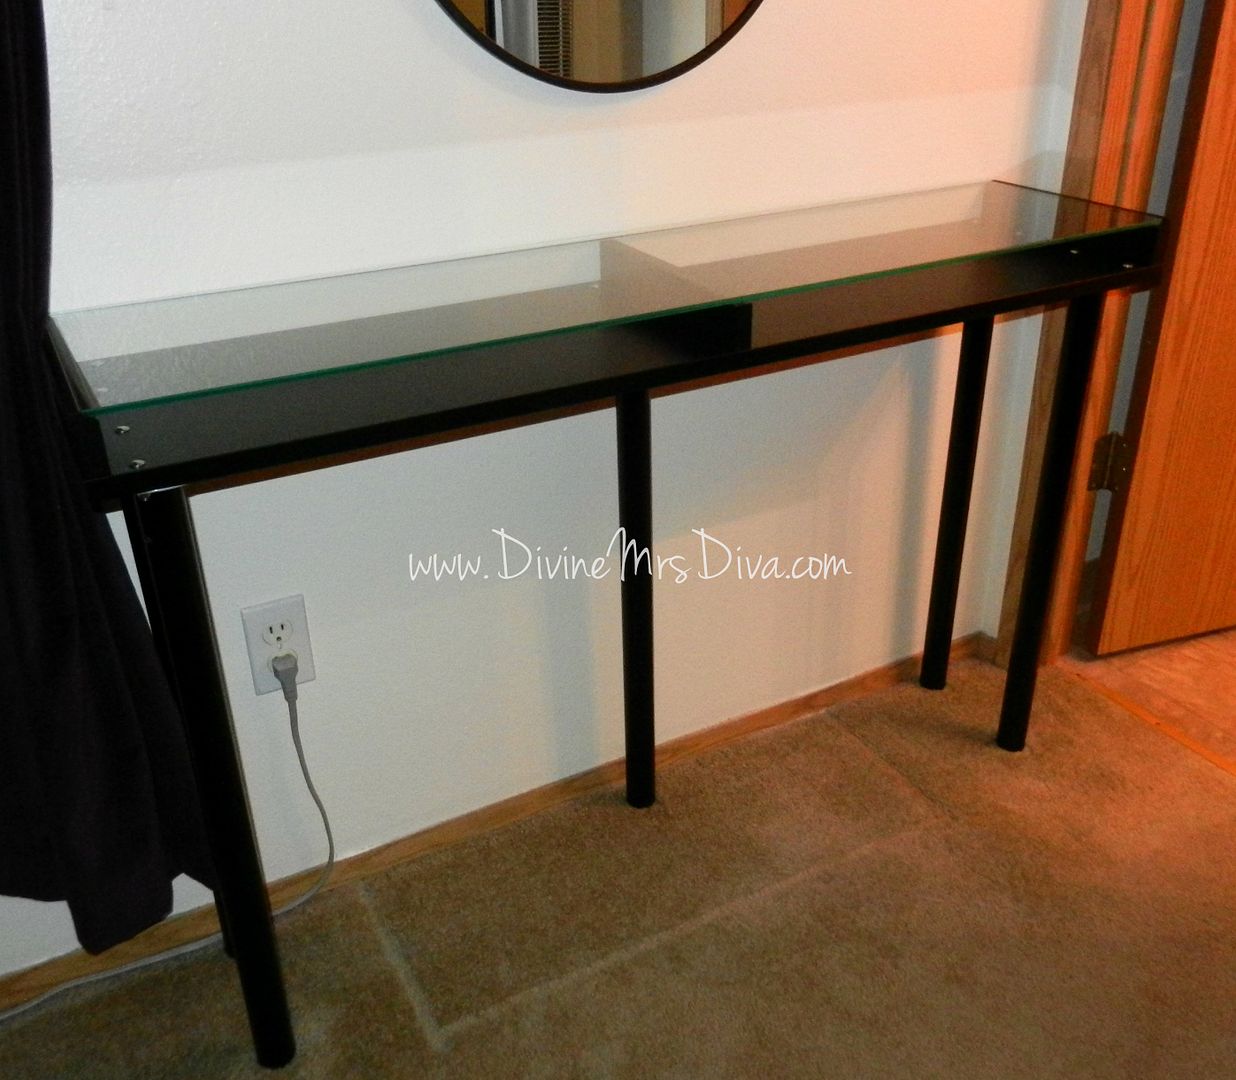
Making this table will set you back about $100. This doesn't count a mirror, chair/stool, or lighting. Something to consider, but all of those can be acquired for relatively small prices. What I love about this table is that it is small enough for my allotted space and has a built-in storage area for many of my makeup goodies. The table itself is eleven inches deep. If you are in a small apartment or cramped room, this is a great option. (If you have more room, there is a larger 27.5" deep option - the Vika Gruvan.)
I decided to do a post about this great vanity table idea, not only because it is awesome and I am in love with mine, but because I wanted to add a tutorial for the construction of the table that the original post was lacking. I relied on my husband's expertise in this area for making the table sturdy and longer-lasting. Screws can strip out of particle board more easily. By acquiring a few extra screws and bolts from our local hardware store, we were able to make a better constructed table that can stand up to more. I also added an additional leg in the middle of the table for added support. As you will see, I have a LOT of makeup for this table to hold.
The whole process only took about an hour. I haven't done a whole lot of projects with a drill and additional screws and such, so I am going to walk you through what I learned. Let's get started, shall we?
What You Will Need:
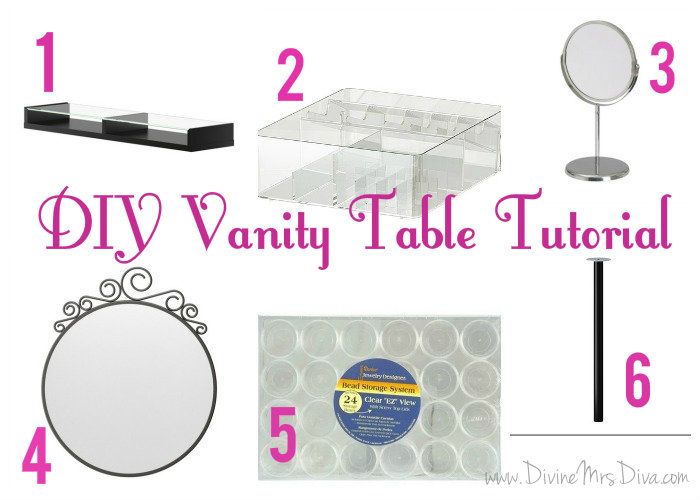
1. Ekby Gruvan Shelf - The larger 46 7/8" x 11" one. Right now, it only comes in black. $39.99
2. GodMorgon box with compartments - If you don't have a lot of makeup or tall things, you can skip this. $18
3. Trensum Table Mirror - I use this for magnifying and close up work. $9.99
4. Ekne Mirror - or some kind of mirror. I chose this one because it was inexpensive. I also liked the scrolling accents in case I need to add some lighting around it. $14.99
5. Darice Jewelry Bead Organizer (9 1/2 inch size) - You can use up to six of these under the glass to organize your makeup. If you choose to utilize the top of the box as well, three will do. I have a lot of palettes, so I use 5 container halves to hold my goods. These can be found at craft stores or on Amazon.com
6. Vika Adils Legs - You will need 5 legs. $3.50 each
Also consider: a stool or chair, lighting, and small garbage can.
Hardware and Tools:
- 10 each Carriage Bolts and Nylock Nuts - The bolts measure 1.25 inches long. About $5.00 total
- 10 of 5/8 inch wood screws. About $1.00 total
- Needle-nose pliers
- Electric drill
- WD-40
- Screwdriver
- Wrench
Directions
Step 1:
Take shelf and 5 legs out of packaging. To take stickers off of the leg mounts, scrape the stickers with an old credit card or gift card. Use WD-40 to clean off all the sticky mess.
Step 2:
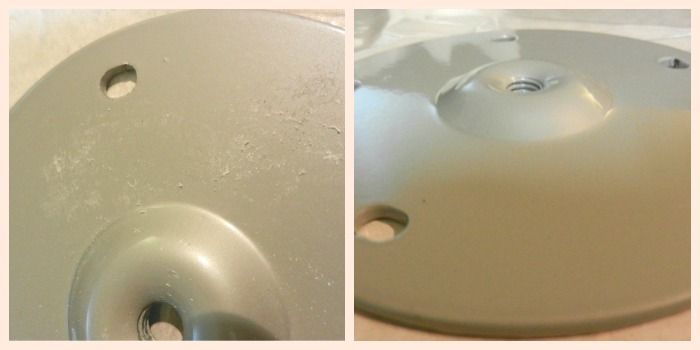
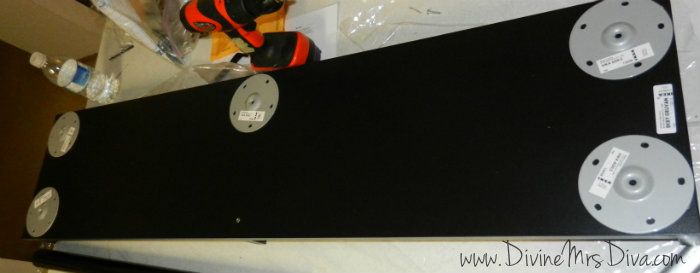
Arrange your mounts on the bottom of the shelf.
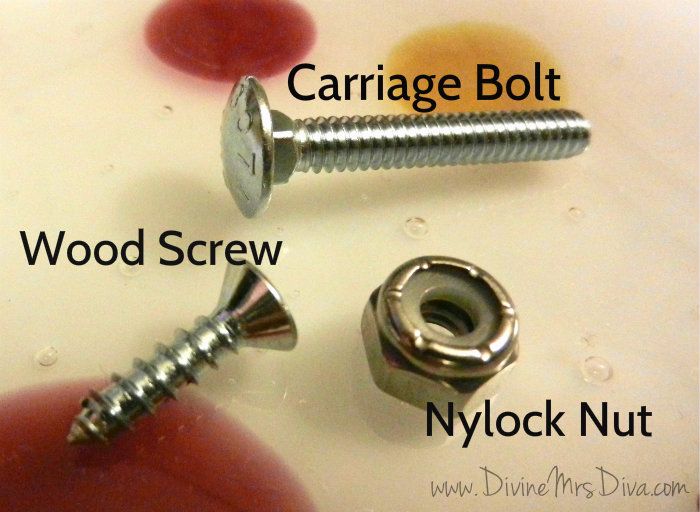
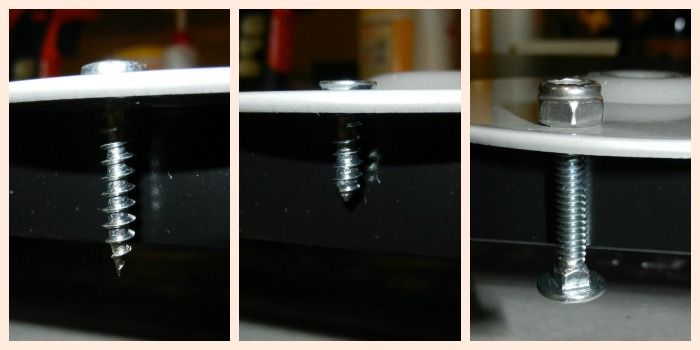
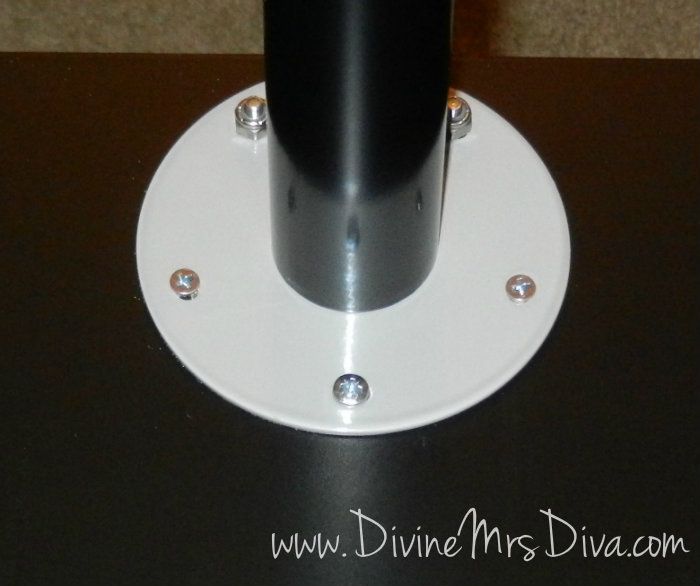
It's important to line up the holes in the leg mounts correctly because we are going to use 3 types of screws/bolts with varying lengths. Here is why:
The first screw is the one that comes with the leg and leg mount. As you can see, it is way too long to be used on the main shelf. Instead, we will utilize these for the sides and middle where we have extra room.
The second screw is a 5/8 wood screw from your trip to the hardware store. It is shorter than our main shelf, so these will work in that area.
Last is the carriage bolt with nylock nut. We are using carriage bolts to make this table sturdy and secure. Without these bolts, any side to side movement or moving around would eventually strip the screws from the particle board. Since we are working with particle board and not wood, the bolts give some extra security to keep things together. The Nylon nut ensures the bolt stays tight.
Step 3:
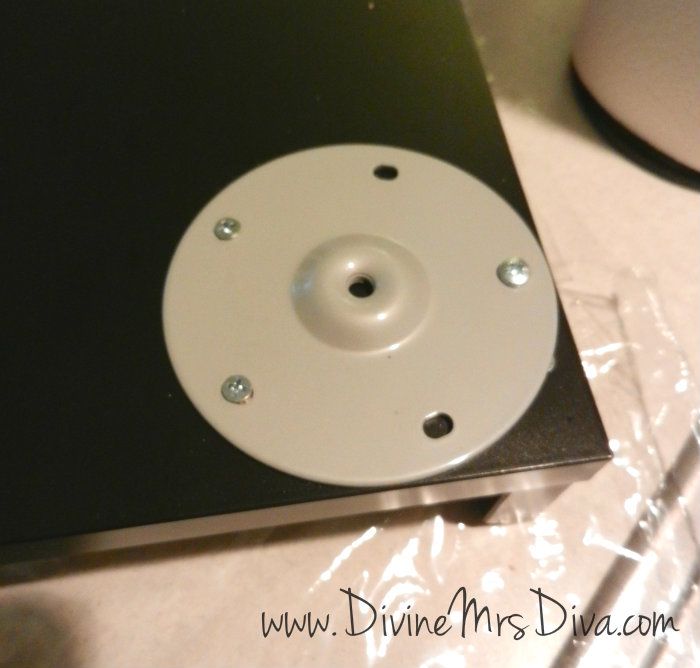
Line up your leg mount. Use one leg screw on the hole near the edge. This is our longer screw that has extra length to go into the shelf side. The wood screws are used in the two holes towards the middle for the thinner shelf area.
Step 4:
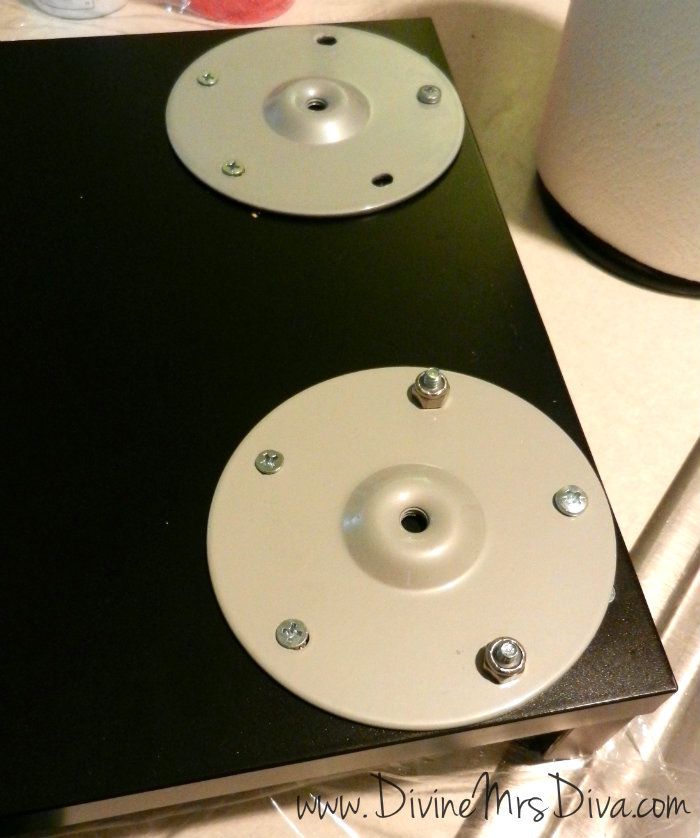
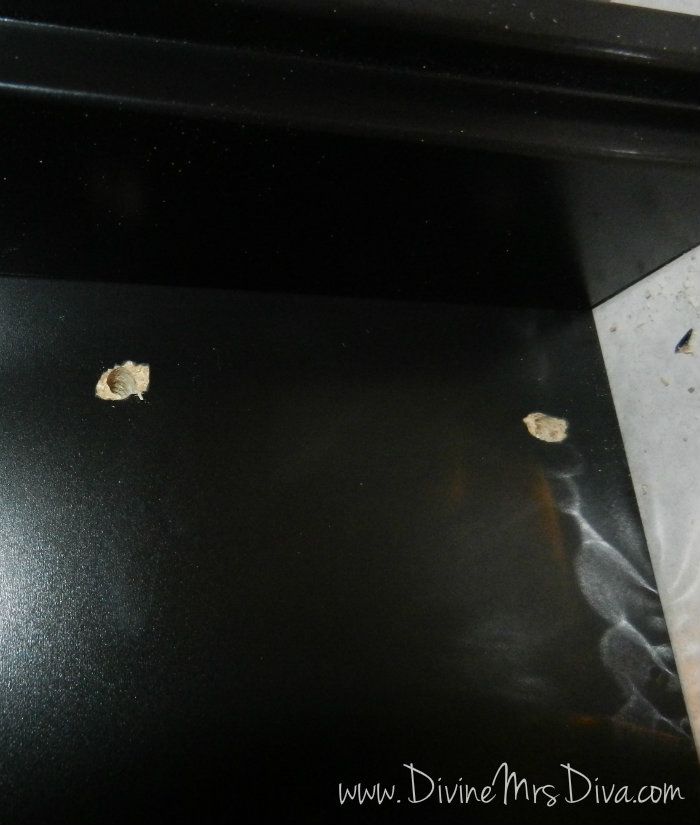
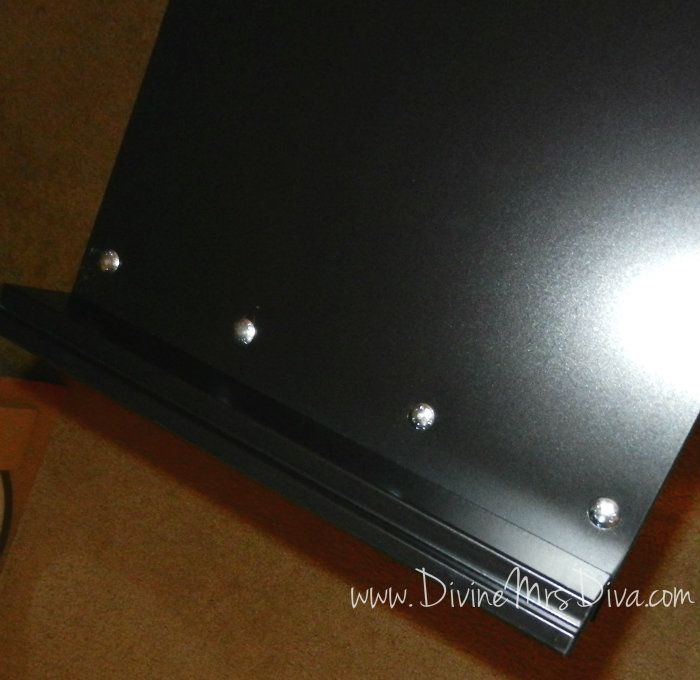
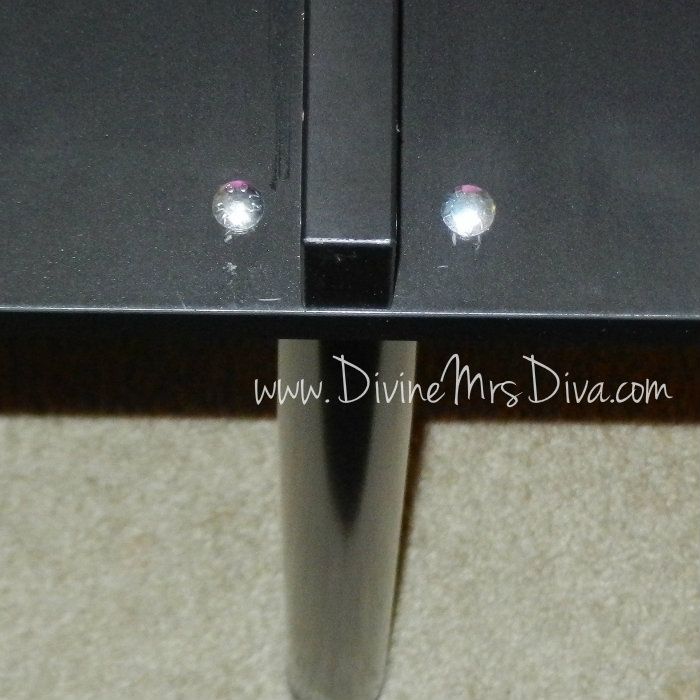
Using a drill bit the same width as the carriage bolt, drill a hole in the other two spots. Place your bolts through and tighten the nuts to the bolts. (The nuts will be against the leg mount, on the bottom side of the shelf. The bolts have slightly domed heads that won't interfere with your storage capabilities on the top side.) Also, when tightening the nut, you will probably need a friend to help you out. One of you should hold the square part of the bolt (just under the head) while the other tightens the nut with a wrench. Be delicate in this step because the square part of the bolt could strip the particle board if you aren't careful. For an easier solution, you can use a lock washer and regular nut.
Repeat Steps 3 and 4 for all the leg mounts. Remember to line up the holes properly for proper screw and bolt placement. For the middle leg mount, remember that the leg screw will go into the middle divider, the short screws into the main shelf, and the carriage bolts towards the edge. Additionally, the nice thing about the carriage bolt is that it covers up the messed up finish on the top side from the drill holes.
Step 5:
Screw the legs into the leg mounts.
Step 6:
Turn that table right side up, wipe it down with a damp cloth, place it where you want it, and install the glass via package instructions.
Step 7:
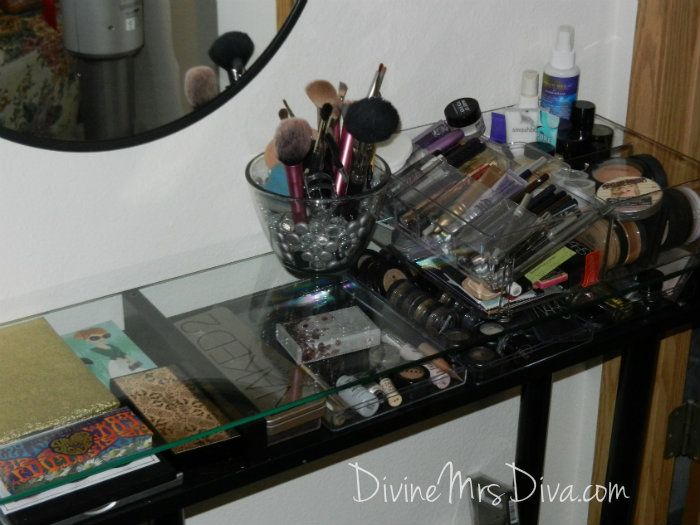
Start filling it up with all of your makeup, hair products, and/or skincare!
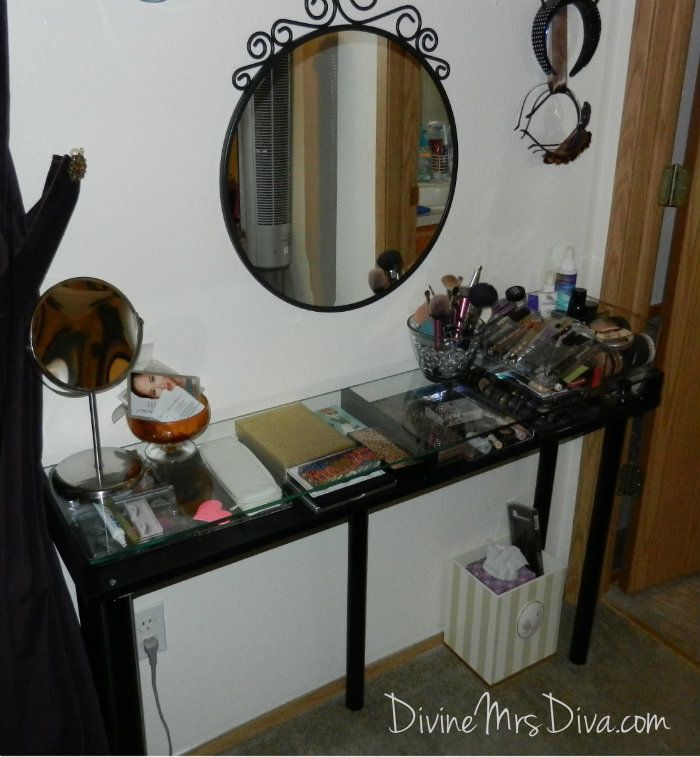
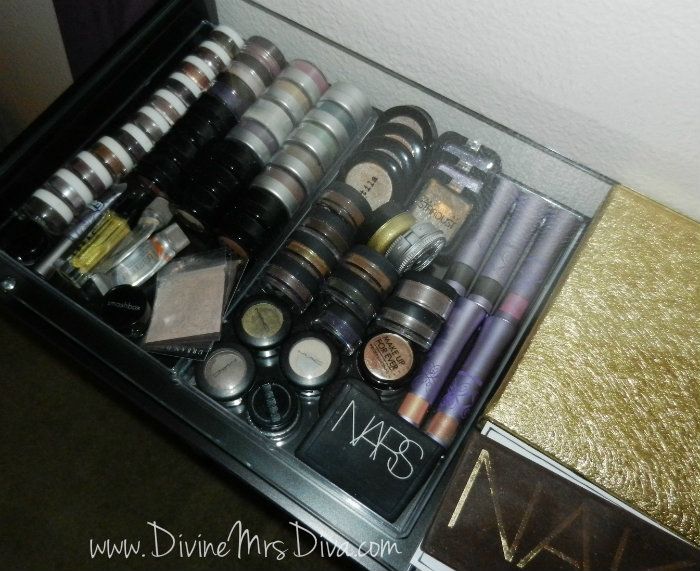
Here I've arranged my eyeshadows in two of the Darice box halves. They can actually hold quite a bit - way more than I thought they would.
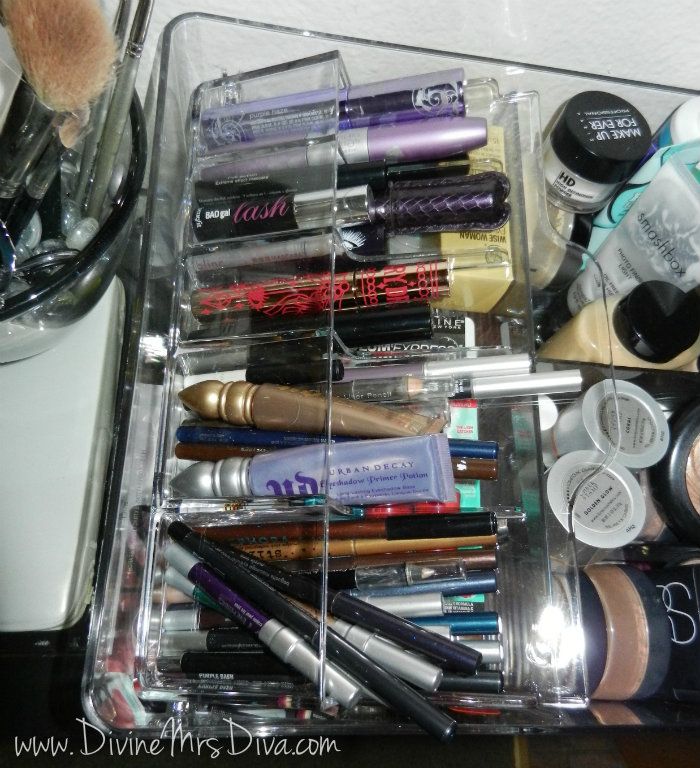
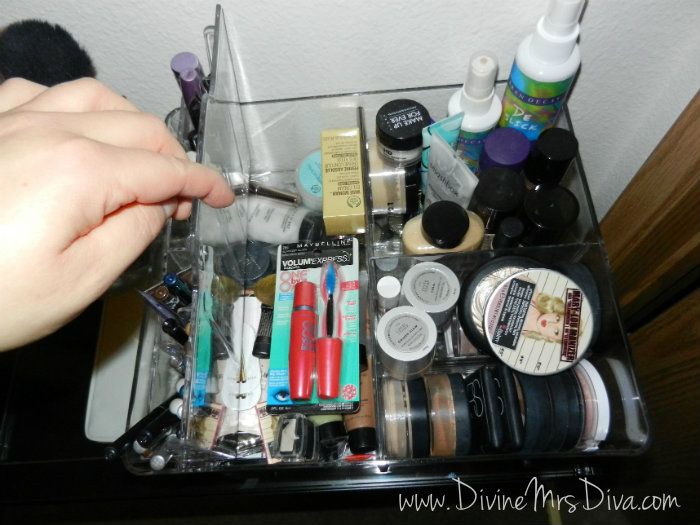
The GodMorgon box from Ikea has some great compartments for eyeliners, eye primer tubes, and mascaras.
This part of the box lifts up to reveal a large compartment underneath. I store my odds and ends, samples, and backup/overstock in this compartment. The three side compartments house all my blushes, mineral foundation, and highlighters, as well as taller products like sprays, foundations, powders, primers, and more.
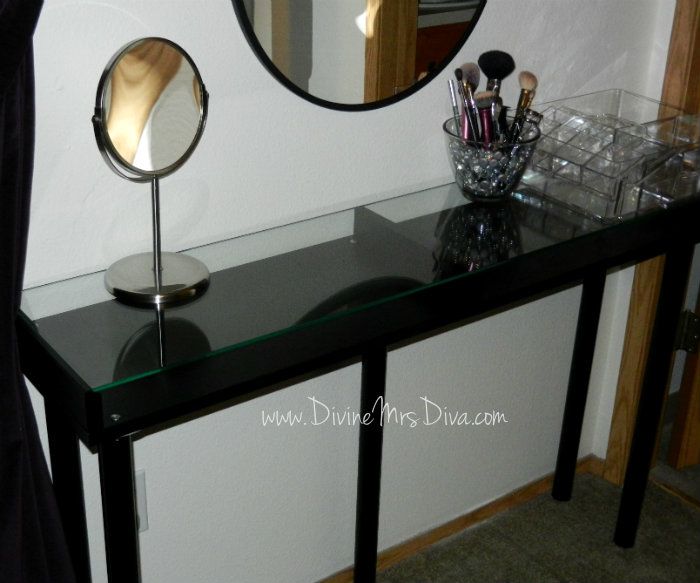
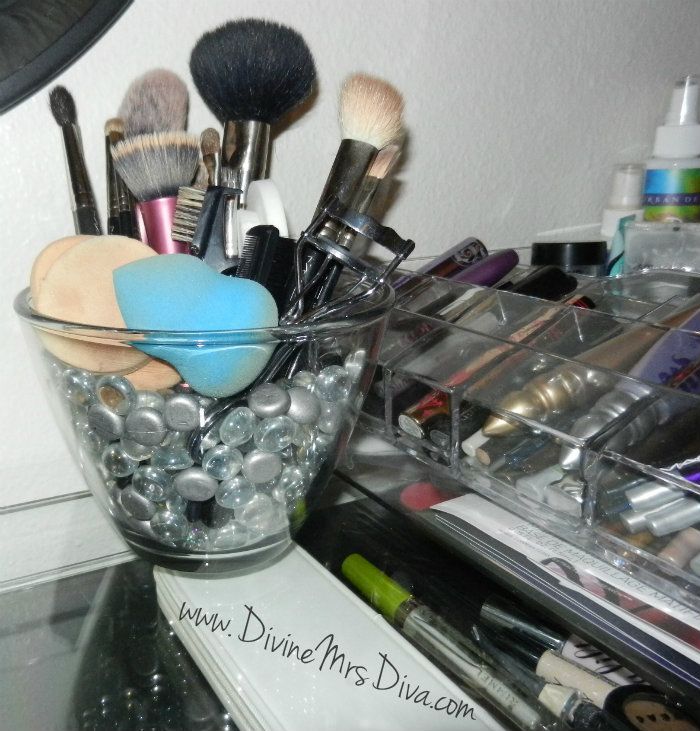
My $6 Brush Holder Vase. I've previously posted a tutorial on this that you can check out HERE.
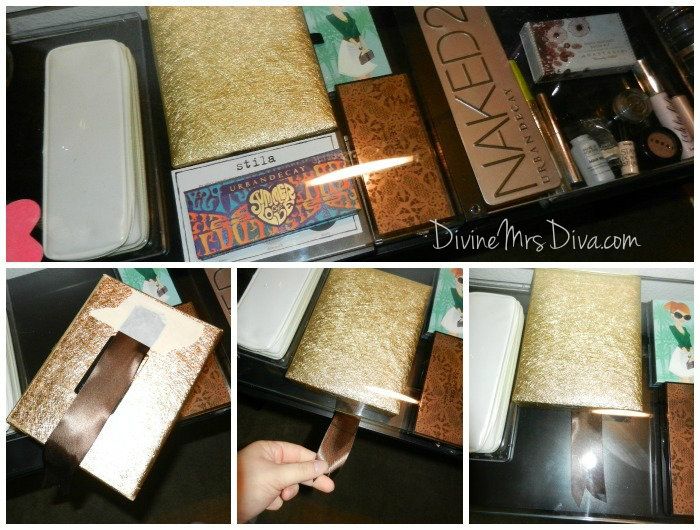
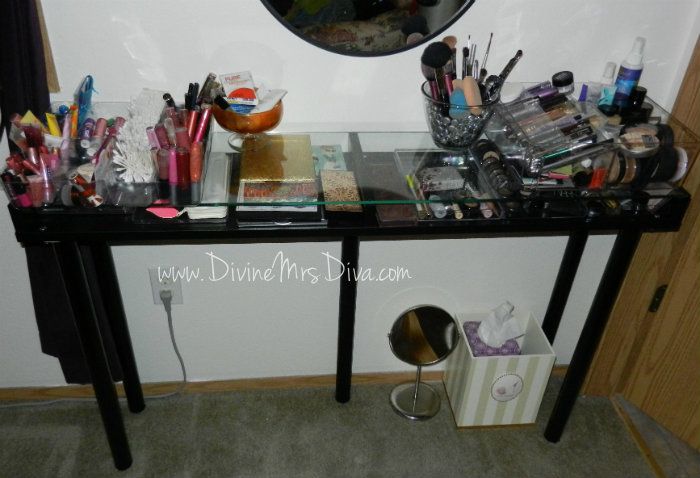
When storing palettes, I wanted to use as much space as I could. The opening for the storage area is a little bit more than 2 inches high. It is hard for me to reach all the way back to get to my palettes. For the ones farther back, I taped a piece of ribbon to the underside and cut it so it was just shorter than the shelf. This way, I can grab the ribbon and pull the palette out easily.
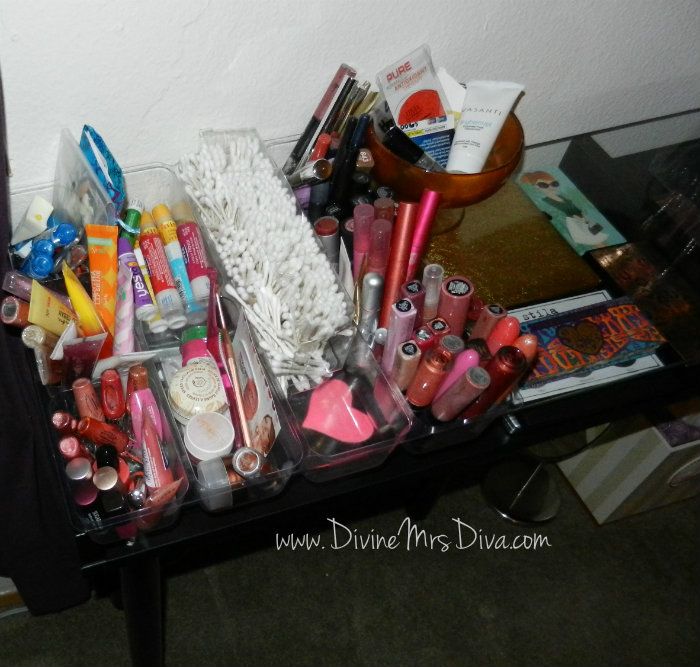
My lip products were originally in a three-drawer plastic container. While the container fit on the table, it was a bit bulky. I found this divided plastic organizer at my local craft store (for about $3). It holds all my lip products, plus some! I added a little dish to hold my Birchbox samples so I can remember to try them out and review them.
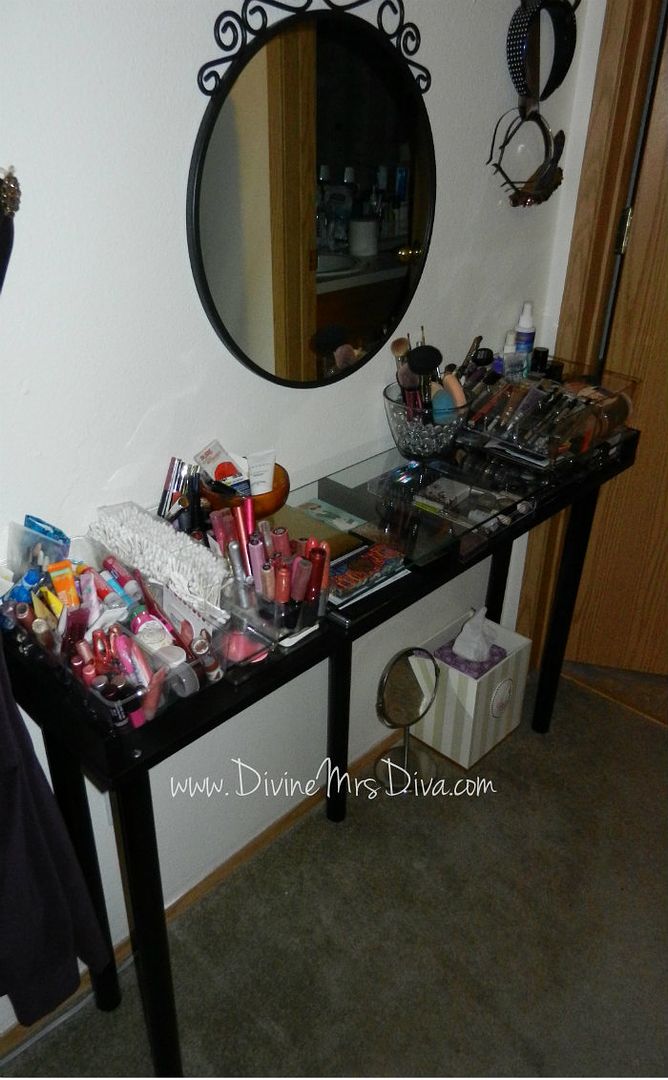
With all of my products on top, it is a little cluttered, but it works for me. I like having everything in view and easy to reach.
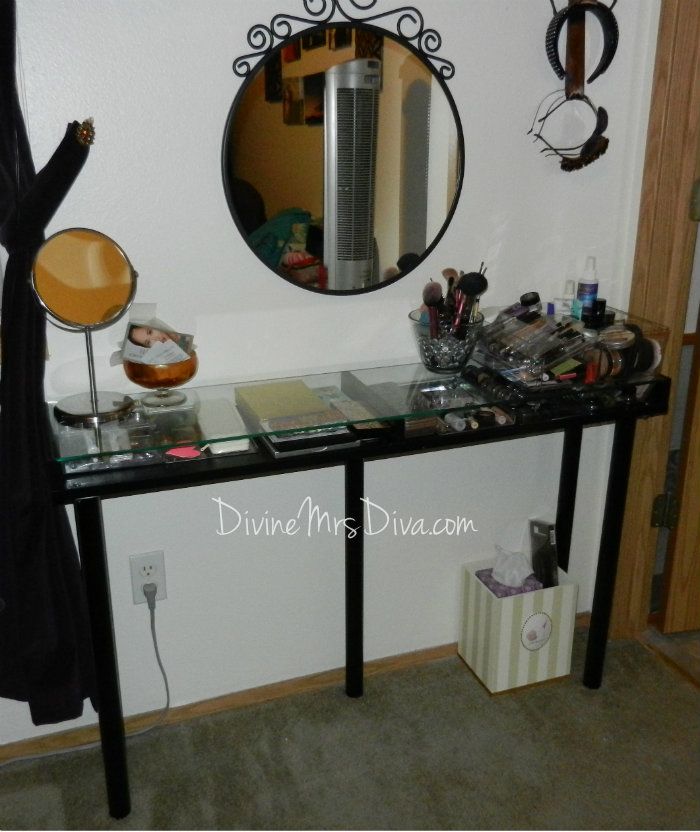
One last view of a cleaner-looking table top.
PS - Right now, I'm using a plain old chair to sit on while I do my makeup. I'm on the look out for a more comfortable, cushiony option.
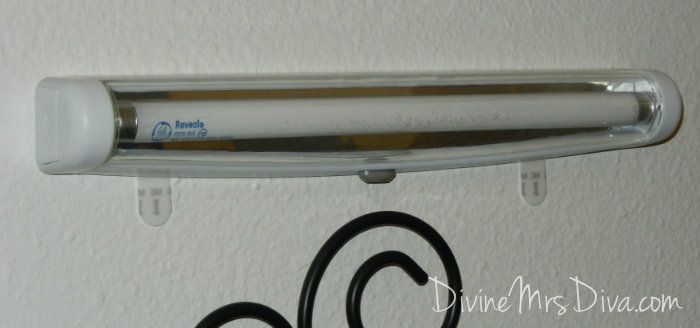
I'm also still working on the lighting situation. The bedroom is pretty dark, and with all the rain around these parts, the window doesn't provide that much light. Right now, I am using a clip-on desk light and a small fluorescent light bar, along with the light from my bathroom. It is a work in progress as we find what works best for my needs.
This light was only $6 at Wal-Mart. It does a pretty good job, but I need light on the sides of the mirror too.
So there you have it! Please let me know if you get the opportunity to make this. I hope this tutorial has helped and inspired you. I love my new vanity table so much! I'm so happy to have one, and happy it holds so much of my makeup products as well. Happy DIYing!




I wish we had the space for another table, we just don't, though I'm seriously thinking of doing a major overhaul to get us a little more space; maybe enough for a vanity table if it's this size. Fingers crossed.
ReplyDeleteWow! That's awesome! Can I come over and get my makeup done! I would love to have a place for a vanity but our bedroom is just so small! Maybe one day I will have my own giant closet and this can be added in addition! :)
ReplyDeleteCome on over! :-) I am so happy to have it. I rearranged the bedroom to make room because we don't have a lot of space either. If I had a bigger area, I would add some kind of stand for my hair stuff, like curling irons, flat iron, blowdryer, etc.
ReplyDeleteFingers crossed indeed! It isn't crazy long and it's only 11 inches deep so it doesn't take up a lot of room. I have mine right next to the bathroom door and can get in and out just fine. :-)
ReplyDeleteThat looks very cool, and I envy your DIY skills. Mine are nonexistent, heh. Every time I buy anything in a box, I either make the manpanion put it together or call my best friend.. she turned her spare room into a closet using all this Ikea stuff. She put it all together and it looks amazing. I wouldn't mind having a vanity table...but if I left my stuff out, my idiot cats would have eyeshadow all over the house. They love small plastic things. Maybe when they get a little older and less interested in destruction. I could probably squeeze in a vanity in the spare bedroom.
ReplyDeleteUnrelated question....I saw a big blue sponge in your brushes jar. Is it one of those Beauty Blender things? What does it do? Is it worth the price?
Those darn cats!! I'm glad my chiwas aren't interested in destruction and cannot jump very high. lol
ReplyDeleteThe big blue sponge is very similar to the Beauty Blender sponge. I didn't like the idea of paying so much for a Beauty Blender, but I found this blue sponge at Target for $10.49. I've been using it a few weeks now and really do love it. I love the shape because it is easier to hold. I use the rounded end to make sure my foundation is blended after I apply it with a brush. The pointy end is great for blending in the crevices around the nose and eyes without moving the foundation around too much. I would definitely recommend it and at half the price of the Beauty Blender, I definitely think it is worth it. It seems good quality. It is soft, but thick. It feels like it will hold up for a while.
Here's the URL for it online: http://www.target.com/p/sonia-kashuk-blending-sponge/-/A-10806931
ReplyDeleteTarget and ultra now sell their own versions of beauty blenders for about $5...I like them just as much.
ReplyDeleteGood to know! I will definitely have to check those out. Thank you!
DeleteAh! Thank you for the detailed construction instructions ;) Do you think the leg in the middle is completely necessary? And how sturdy does it feel on your carpet?
ReplyDeleteThe leg in the middle is probably not necessary. If your table is against the wall and you aren't leaning on it all the time, you could leave the middle leg out.
ReplyDeleteI have found the table to feel quite sturdy on carpet or a hardwood floor. It doesn't jiggle or wobble. If you have any more questions, don't hesitate to comment or email me! :-)